Cleaning your house while your kids are still growing is like shoveling the walk before it stops snowing. —Phyllis Diller
As every parent knows cleaning a house can be very tedious and time consuming. In order to run a good sufficient household it takes everyone’s involvement. Within my home I have tried numerous chore system that turn out to be a FAIL. Through out the trail and error process of finding the right system I have learned a few things. The most important one is that children love structure! Just like adults children thrive in an environment with a schedule, as long as the schedule is not to complex.
Today I want to share with you the most successful chore system that I have created for my children. The directions and supplies are very simple. So lets get crafting!
SUPPLIES:
– Hot glue gun
– Printer paper (various colors)
– A sheet of notebook paper
– Colored ink pens
– Velcro
– Laminating machine
– Twine (or another type of string)
– Thumb tacks
– Paper clips
– 2 Medium sized envelopes as well as 2 per child ( I used 3 5/8″ x 6 1/2″)
– An easy access sturdy place to hang the system
– Scissors
– Knife/ box cutter
– Glue
Directions:
1.) Plug up and turn on your laminating machine. Take the sheet of notebook paper and walk around your home. Write down every chore that your child can or will learn to complete. This inventory process will narrow down the chores for your system.
2.) Write down the chores on a white sheet of printer, I used colorful pens just to make the chores pop off the paper.
3.) Cut out the chores in the shape of a square. Glue the chore to a different colored piece of paper and cut out a larger square shape. This will frame the chore. See picture below.

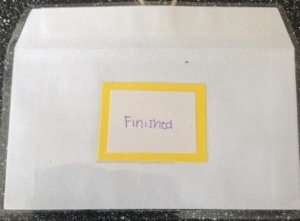
4.) Use a white piece of printer paper write To Do and Finished. Write To do and Finished for every child. I assigned a specific color for each child it made the system a lot more organized. Once you finish writing cut out the words, glue and arrange them in the same way as step 3. Once you’ve framed the To do and Finished glue them onto the envelopes. See picture below.

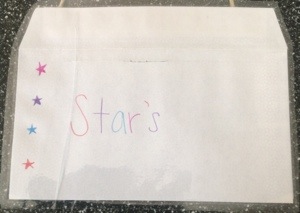
5.) Take two envelopes and write Chores on one and Stars or stickers on the other. I used the stars because I did not want to replace the reward charts every week. See picture below.

6.) Plug up your hot glue gun so that it can heat up. The stars are made by simply drawing 7 small stars in the color assigned for that child. Once the stars are drawn cut them out as small as you can. Approximately the size of a sticker. See picture below.

7.) Fold a piece of printer paper into fourths. Cut out one section per child. Write your child’s name at the top center using their assigned color. This will be their reward chart.

*****Ignore the Velcro, that step comes later*****
8.) Laminate everything from step 3-6. Cut out everything that you laminated making sure to cut in precise straight lines.
9.) Use a box cuter or scissors/ knife/ or box cutter to cut the open ending of the envelope. See picture below.

*****Ignore the twine, that step comes later*****
10.) Grab your twine and make a loop. (Make sure you do not make the loop to long or your envelopes will hang to low). Hot glue a piece of twine shaped like a loop onto the back of all the to do and finished envelopes, as well as everything in steps 4, 5 and 7. See picture below.

*****😏Ignore the dried up glue on the gun*****
11.) Stick a paper clip onto the twine of all the loops. Pull the paper clip apart just a littel to make it easier to hang. See picture below.

12.) Use your hot glue gun to glue the velcro to the back of all the stars, and reward charts. Making sure the Velcro sides match the Velcro that it will stick to on the reward charts. See picture below.

13.) Find a good place to hang your chore system. I choose the basement door connected to my kitchen because of the easy access. Hammer or stick tacks through the door, choose whatever flow you wish. See picture below.

14.) Place all chores into the chore envelope, and all of the stars into the star envelope.
15.) Hang all of the envelopes and charts by their paper clips on the tacks. Than your chore system is complete!!!! See pictures below.
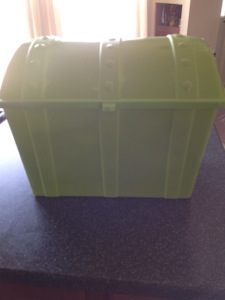
In our home a new chore is usually assigned daily, to go along with each child’s daily chores. The daily chores are simple task such as making their bed, hanging up their back packs, or brushing their teeth. The chore envelopes are used to keep track of what needs to be done by each individual child. When the children finish breakfast it’s usually daily chore time. The chores that I place in the envelopes get completed after snack in the evening. Which for my youngest 3 year old daughter includes placing all of the dogs toys in his bin. You know simple quick chores like that. Once the to do chores are complete they will place them into the finished envelopes. At the end of the day each child is given a star if all of their to do chores are complete and placed into their finished envelopes. Once 7 stars are on their reward chart they are allowed to get something out of the treasure chest. Which is not always on a Sunday or Friday. We do not start over every week because I felt as though it was to harsh to say all their hard work 2 days ago doesn’t matter on Friday when they only have 4 out of 7 stars. So I let the stars roll over each week, unless it becomes to repetitive. For info on the treasure chest continue reading.
REWARDS (Optional)

In my house rewards are given to each child once they have a weeks worth of stars on their rewards sheet. I brought a treasure chest from Walmart and filled it with an array of toys, games and prizes. Occasionally I will add sweet treats like fruit snacks, lolly pops and bubble gum. A great idea is to fill it with party favor items. Party favor packs work very well, especially if you have more than one child.

I hope the chore system I’ve created works just as well in your home as it does in ours.


